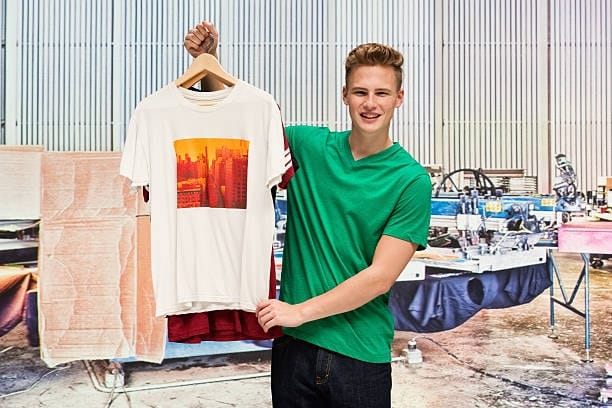
Designing your own T-shirts, from the comfort of your home can quite be entertaining and rewarding, if you fancy artistic work, your want to venture into the business of designing clothes or simply, want to just design your own shirts or for special gifts. You would be amazed at how with just a couple of basic equipment, items, and processes, transformed your ideas into pieces of masterpiece right at the convenience of your own home light colored shirts. This has been designed in a step by step manner to help those who are new to the technology go through the whole process of choosing the right material up to the time they are ready to print the first object. Let’s get started!
Choosing the Right Materials and Tools

There are materials that are required before T-shirt printing is undertaken online store and a few tools as well. Here’s what you’ll need:
T-Shirts
For better results, it is recommended that you use 100% natural cotton T shirts. Cotton takes ink or dye in better way so the prints on light shirts are bright and long lasting creating custom t shirts. Wash the T-shirts before designing to avoid impacts from any sizing or residue on t shirt business the design dark colored shirts.
Printing Techniques
Choose the technique of printing that will be easier for you to accomplish and give the finished product that you have in mind. Common techniques include:
- Iron-On Transfers: Ideal for beginners, using heat transfer paper and an iron finished shirt.
- Screen Printing: A versatile and professional-looking option.
- Sublimation: Perfect for polyester fabrics and intricate designs.
- Vinyl Cutting: Creates clean and bold designs using heat-transfer vinyl (HTV).
Essential Tools
- Design Software: Tools include adobe illustrator, Canva designing tools or tools like GIMP for designing single graphics.
- Printer: An inkjet or laser printer, depending on what transfer paper you go with.
- Heat Source: A house hold iron or a heat pressing machine cotton shirts.
- Cutting Tools: Scissors, razor blades or utility knives, or electronic cutting tools such as Cricut or Silhouette.
- Other Supplies: Heat transfer paper, vinyl sheets, stencils, Ink and squeegee.
Preparing Your Design
Step 1: Conceptualize Your Idea
Ideas brainstorming and quick sketches should be done in digital interface tools before proceeding to the next step dark shirts. If you are a beginner, then it is advisable to create simple designs, while complex designs’ highlights are difficult to implement.
Step 2: Create the Digital Design
Design your artwork by using design software. It is also very important to check that the picture used in the design is of high resolution, greater than 300 DPI. It must be saved in formats such as PNG or PDF.
Step 3: Mirror the Design
When it comes to transfer printing and heat-transfer vinyl, you might want to transfer your design horizontally print shirts t shirt printing method. This makes sure that the design laid down dark transfer paper would look right on flat surface of the t-shirt.
How to Print T-Shirts At Home
Having prepared ourselves with all the materials that would be required for custom t shirts then we proceed to the following guide on how to create your own custom tee and home made t-shirts.
1. Design Your T-Shirt:
It is crucial that your design is set before going to print the document on light transfer paper. This design can be created using other programs for graphic design such as Adobe Illustrator or Canva or can be simply borrowed from other websites. Make sure that to export your design in the right format of your transfer paper preferred formats are PDFs or JPEGs.
2. Print Your Design:
Instead what you are transferred on papers has to be incorporated with the regular printer paper used alongside your design and printed the same way like any other piece of print on demand service of paper. Before making your transfer paper you are encouraged to look at the instruction manual on the kind of grain best suited for use. As soon as you have printed your design, wait until the material used for the design dries up as you are advised to do for other materials that you may have used in the design.
3. Trim Your Design:
Trimming your printed design involves either using a scissor or a paper cutter and estimatedly, erasing about a quarter of an inch of the paper from the edges of the image. This is good to follow especially if you want to be able to fit your design properly on the t-shirt.
4. Preheat Your T-Shirt:
Before the design is applied on the t-shirt one has to heat it in the heat press for about 10-15 seconds. This way we will also help to prevent the backdrop of your design from shifting and not positioning right on finished plain t shirt, during the pressing.
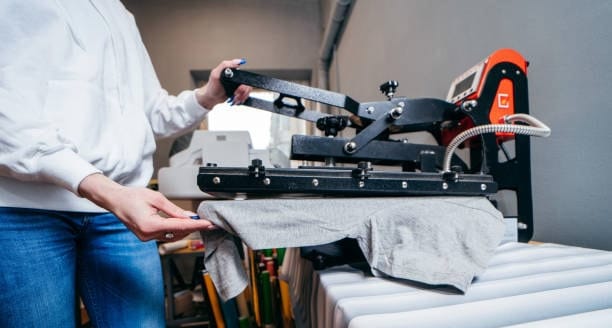
5. Apply Your Design:
Place your t-shirt inside the heat press through the front-part of the printed design facing upwards. Apply pressure on the heat press printing iron on transfer paper for the required time depending with the type of transfer paper used. As you manage the process of t shirt printing it is also important that you know the temperature and pressure that is to be used on the t shirt material.
6. Cool the T-Shirt:
As has been observed before, always avoid lifting blank shirt from the print on demand heat press before your t-shirt has cooled down. This will help you to avoid such issues as poor adherence of the design to the fabrics so necessary in fashion design.
7. Wash and Care for Your T-Shirt:\
But before we part ways online t shirt business, let’s wear our newly crafted t-shirt design and wash it using the care instruction of your t-shirt and transfer paper. There are no heat transfer materials that cannot be washed and dried but make sure you read through descriptions on how to wash and dry your blank t shirts and heat transfer products.
Printing Techniques and Their Processes
Method 1: Iron-On Transfers
- Print the Design: Using a heat transfer paper, make a print out of your design using appropriate settings from the printer for the paper type.
- Cut and Place: Cut all the unnecessary paper around the design and then put it wrong side up on the T-shirt.
- Apply Heat: To transfer it on the fabric, heat press is used to heat the material and for it to take the design pressed with a hot iron in equal pressure.
- Peel Off: Allow it to transfer and adhere for a minute or two allowing it to cool a little before removing the backing paper.
Method 2: Screen Printing
- Create a Stencil: To do this you will need to use either a vinyl cutter or a craft knife to cut your design out on a stencil sheet.
- Set Up the Screen: Put the stencil on a mesh screen and place it onto the T-shirt.
- Apply Ink: Put the fabric ink on the surface of the screen with a squeegee in through the mesh.
- Dry and Cure: Wait for the ink to dry and never blot it instead use heat and iron it to make it last longer.
Method 3: Sublimation Printing
- Print the Design: Print your design from a sublimation ink printer and onto sublimation paper.
- Prepare the T-Shirt: Sublimation is markedly appropriate on white or other pastel colored polyester T-shirts and other fabrics.
- Heat Press: Superimpose the design with the printed side down on the shirt, then cover it with the heat press machine.
- Remove Paper: Once it solidifies, then you can peel of the paper and obtain a bright colored, clearly printed design.
Method 4: Vinyl Cutting
- Cut the Vinyl: Take your design and using a vinyl cutter, cut it out on heat-transfer vinyl.
- Weed the Design: Cut out all unnecessary vinyl and consider only the design which has to be applied on the T-shirt.
- Heat Transfer: Lay the vinyl on the T-shirt and then iron over the vinyl or use a heat press.
- Peel Backing: Cover your design with a clear plastic sheet and let dry Peel off the clear backing sheet to see your design.
Essential Tools and Supplies for Printing T-Shirts at Home

Designing t-shirts at home can be a fun activity for anybody, particularly when getting started in heat transfer vinyl printing or sublimation printing. To achieve these goals we must provide for the right equipment and materials. In this article, I’ll outline the most fundamental equipment and substances that you may require first.
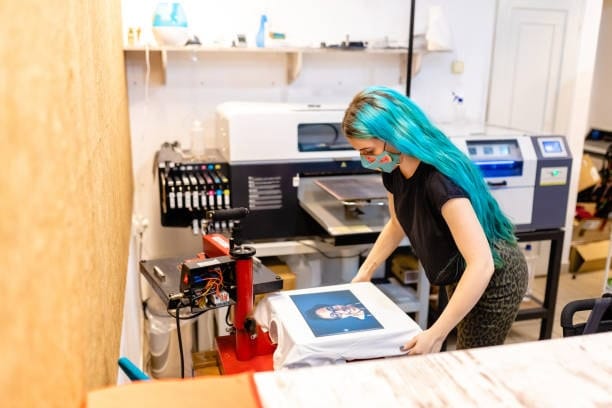
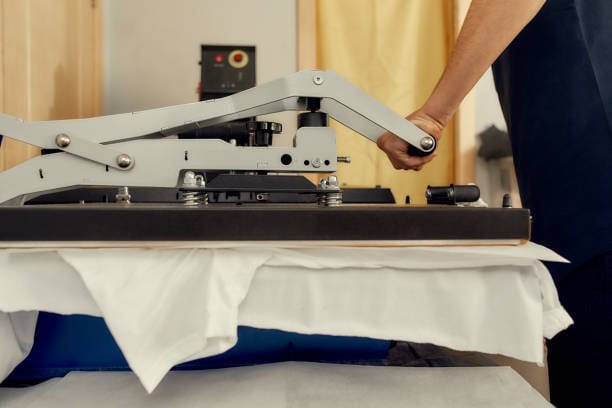
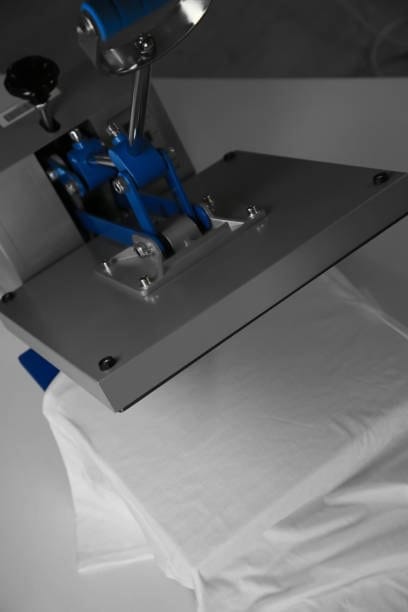
1. Heat Press Machine: The Heart of T-Shirt Printing
Heat press machine is an essential piece of equipment used in application of designs with heat and pressure onto fabrics. One might consider it as a dedicative professional iron station for crafting and printing exclusively.
- Types of Heat Press Machines
- Flat Heat Press: A great choice for T-shirts, cotton pillow cases, and other flat based project .
- Mini Heat Press: Ideal for single stand constructions or complex stencils.
- Cap Press: Especially suitable for printing on hats and cap as it is designed for the purpose.
- Mug Press: Applied for the imprinting of cups and ceramics.
Begin with a flat heat press machine because it’s a general type model heat press machine. To diversify it is recommended to add cap and mug presses to your range as your business develop.
2. Inkjet Printer: Essential for Sublimation Printing
Anyone who intends to go into dye sublimation printing definitely needs a good quality inkjet printer. While laser printers, inkjet is much better suited for dye sublimation ink that forms a perfect bond with fabric.
- Recommended Printer Brands:
- Epson and Sawgrass are well known in sublimation printing since they are dependable, and they produce bright colors.
- Why Inkjet Printers Are Superior:
- They offer right color hues and work with numerous types of the sublimation papers because of right details in the designs.
3. Cutting Machine: Precision for Vinyl Printing
This invention of this cutting machine is inevitable if one is to make complex designs in the heat transfer vinyl (HTV). It enables you to make a more accurate and detailed form of cuts on the shapes that you want.
- Top Cutting Machine Brands:
- Some of the worthy brands in the market are Silhouette, Cricut, and Brother brands.
- Sizes to Consider:
- For instance, for starters, this cutting machine can be small as 12-inch to cater for all the basic jobs.
- The biggest machines, that can print 24 inches wide are better in larger projects, such as the application on walls or banners.
Additional Supplies for a Successful Start
In addition to the primary machines, a variety of tools and materials are essential to streamline your t-shirt printing process:
- Cutting Mat: Offers a stable and firm platform which allows the implementer to make clean cuts.
- Scissors: For trimming excess vinyl.
- Weeding Tool or Pen: To erase certain vinyl such as that which was used to create a particular design.
- Desk Lamp or Light Pad: Has increased visibility during the period of weeding.
Heat Transfer Vinyl (HTV) Printing: How It Works
One of the preferred and efficient methods to design that also makes a finished product very durable is heat transfer vinyl screen printing ink. The process of heat transfer vinyl method therefore entails the use of heat and pressure to transfer specialty vinyl to fabric.
Steps to Follow:
- Design Creation: Your layout should be made with the help of design software of your cutting machine.
- Cutting the Vinyl: Cut out the design out from the heat transfer vinyl using your cutting machine.
- Weeding: Make sure you cut out extra vinyl today leaving a pattern of your desire on the car’s glass.
- Heat Transfer: Put the vinyl on your fabric and then iron it with an industrial heat press machine that will adhere the design permanently.
Supplies Needed for HTV Printing:

- Heat transfer vinyl
- Cutting machine
- Other clearing aids such as pens or picks
- Cutting mat
- Heat press machine of Easy Press
- The right materials include cotton T-shirts, canvas bags or denim.
Why Choose Home-Based T-Shirt Printing?
When you begin your t-shirt printing at the comfort of your own home, it is a good opportunity to do as you please, be creative and if the business custom print t shirts that is lucky enough to boom, it will be a bonus. After getting the right equipment such as the heat press machine, ink jet printer, and the correct cutting machine, then you will be a boss of printing quality of products for the clients.
The above essentials with a little imagination and digital printing you are set to create your own custom t shirt on-shirt printing dream!
Tips for Success

- Test Prints: It is also important to always trial the design on scrap material before combining with the T-shirt material.
- Use Proper Heat Settings: It is also important not to burn the fabric if you are transferring your design, or to undercook the fabric while using a dryer.
- Maintain Clean Tools: Slice your monitor, squeegee, or cutting blade, to avoid streaks and mistakes.
- Experiment with Colors: Add another layer of color or use different technique to give the artwork distinct appearance.
Comprehensive Guide to T-Shirt Printing Techniques
What has been documented here is that there are several design and production techniques that are important when starting a t-shirt printing business. Moreover, apart from sublimation and heat transfer printing, there are still more unique ways that can be done. Here’s a breakdown of the key methods, their tools, and their unique advantages and challenges:
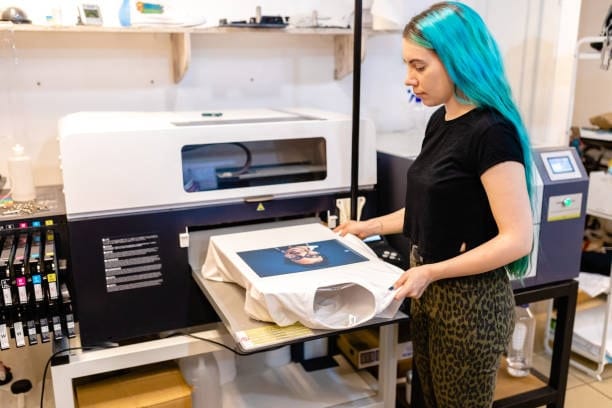
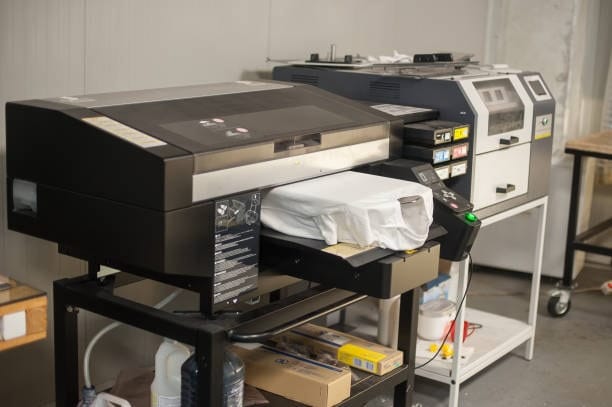
Direct-to-Garment (DTG) Printing
Direct-to-Garment printing employs a direct-to-garment printer that dispenses the design on the garments being printed. This technique proves very effective for screen printing requires where fine detailed high quality prints with just the right amount of smoothness are required. Its color resolution is unmatched and the colors are vibrant, however, the cost of a DTG printer would be high initially, making it suitable for expensive small orders or custom shirts.
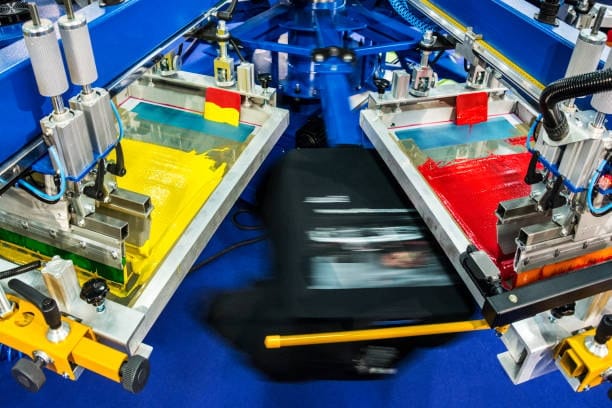
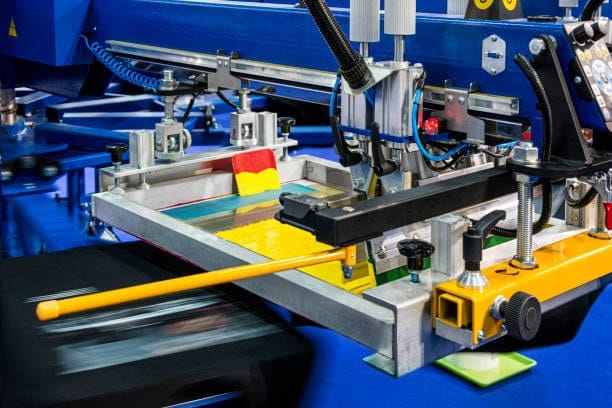
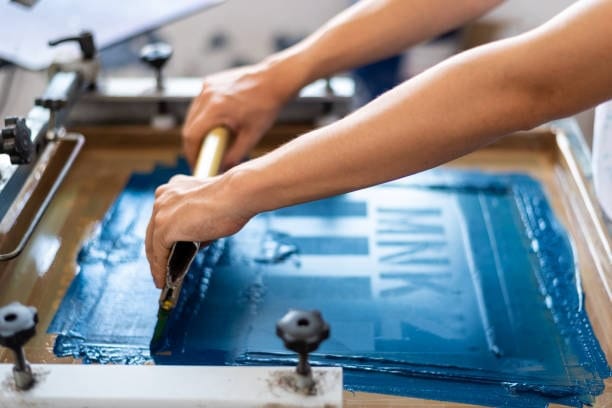
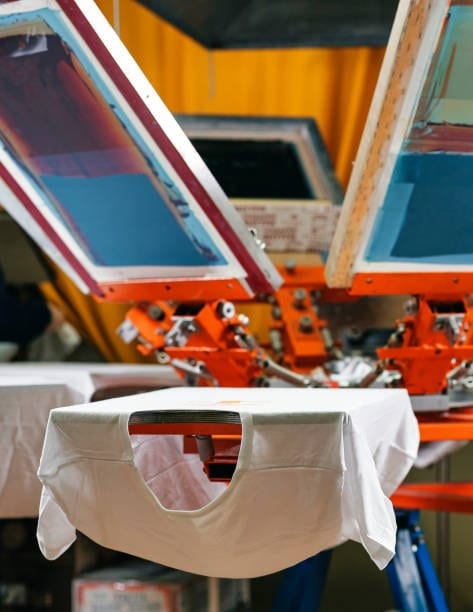
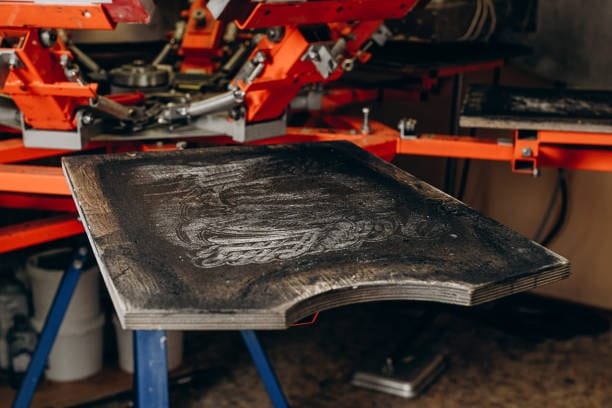
Screen Printing
Sreen printing on the other hand is one of the oldest methods which however has a very high efficiency of creating designs that are rather bold and long lasting. This process entails action of smearing ink on a material with a stencil or emulsion by means of a mesh screen. Even though it needs space to work and entails a time consuming preparation, it is cheap when it comes to the quantity production providing bright colored and clear images.
Printable Vinyl Transfer
This method use printable vinyl, cutting machine, eco-solvent ink and heat press to print and apply the designs. This type can be printed and then transferred on to fabrics, and is best suited to ripped fabric paint, edges and special textures. However, this is not cheap and the range of colour choices is quite limited and for this reason, is better done for special orders only.
Heat Transfer Paper Printing (Dark/Light Fabrics)
Heat transfer paper printing include inkjet printer with a pigment ink, a cutter machine, and heat press machine. It is suitable for making modifications of cotton blend shirts or for few quantities or unique designs of t-shirts. It is a very flexible system especially when it comes to printing from time to time but its cost is relatively high for large amounts of prints and it has certain disadvantages concerning the sturdiness of the prints in opposition to other approaches.
Knowledge about the basic distinctions of custom t shirt business.-shirt printing methods allows to make the right decision concerning the choice of the custom t shirt design method taking into consideration business objectives, clients’ preferences and specifics of production.
Troubleshooting Common Issues
- Blurry Prints: Make sure your picture is in high quality and your printer settings are also well chosen.
- Peeling Transfers: Heat and pressure it enough to make sure that the design is properly bonded.
- Ink Bleeding: The type of ink to be used depends on the fabric type and it is very important not to over wet the material.
- Misaligned Designs: Before pressing make sure to align your design correctly using rulers or guides and space evenly.
Caring for Your Printed T-Shirts at home

Proper care ensures the longevity of your designs:
- Wear T-shirts inside out and wash them in cold water.
- Do not use strong soap or washing powder or bleach to wash the clothes.
- You should always avoid bending or twisting of the fabric or you can either hang to dry the garment or dry it by using the low heat setting in the dryer.
- Steer clear from ironing straight on the printed design shirts at home.
Conclusion
Home T-shirt printing is a very fulfilling and artistic task and you can really come up with lots of great custom designs here. This anti-wrinkle step-by-step guide will help you get professional results in t-shirt printing so that you will be proud of what you have done. If you’re creating a gift, pushing a brand, or just making something because you enjoy the process, the skills that you get here will allow you to make your vision come true.
Summary
Came up with these guidelines: Selecting materials: In order to create your at-home T-shirts, you have to choose between DTG, vinyl, or screen-printing methods. Yes, friends the key is to be patient, work hard and soon you will be coming up with lovely designs as well as strong structures. Begin your T shirt printing experience today and be as artistic as you want to be!

